Quitabug Handmades- Home
Shop Now
Order 24/7
Join my Team
Paper Pumpkin
Classes and Events
Videos and Projects
Videos
Image Map
Showing posts with label ghirardelli treat. Show all posts

Tuesday, November 30, 2021

Thank You Mini Ghirardelli Treat Holder


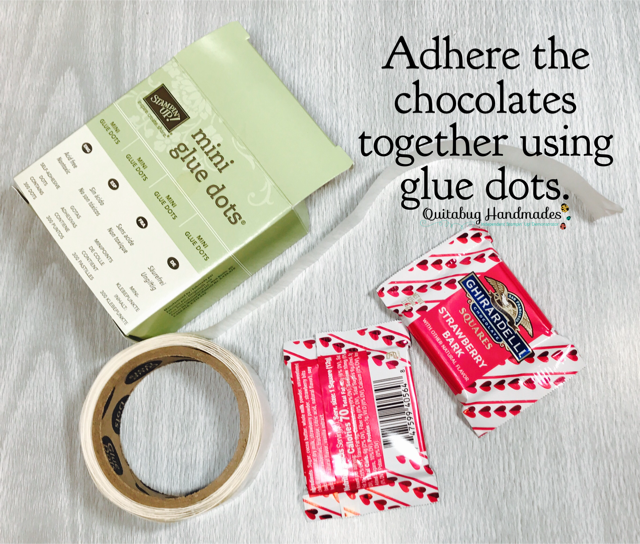
Hey there! I'm excited to share today's project! These cute little Ghirardelli treat holders are a remake of my Mini File Folder Treat Holders from 20217. These came at a special video request from my friend Lisa. I was super excited to have to think outside the box to recreate these. My original version was created using the envelope punch board, which we no longer sell, so I had to come up with another way to design them using current product. What do you think?

Host Code- 42U4AS7D
Click the button below to shop.

Watch the video tutorial below or CLICK HERE for step by step instructions for this project.


Evening Evergreen scalloped rectangle score at 1.5" & 1.75"
Tidings of Christmas DSP 1.25" x 2.5" & 2" x 2.5"

NOTE: If viewing this blog post from an email, CLICK HERE to view with full supply list.


Happening Now
♥ December Ordering Gift HERE
♥ Sign Up for my Weekly Newsletter HERE
♥ Join My Team of Quitabug Stampers HERE
♥ Subscribe to Paper Pumpkin HERE

Shop Now Join my Team Paper Pumpkin Image Map

Friday, February 2, 2018

Cute Little Banner Wrapped Chocolates


Today's project is a quick and easy wrapped chocolate treat featuring some left over pieces from my January 2018 Paper Pumpkin Kit- Heartfelt Love Notes. These are simple, cute little treats to make with minimal supplies.


HOST CODE- 9BDUHS3V
SHOP Stampin' Up!


Measurements
Pick a Pattern Designer Paper 1.75" x 8"


Helpful Tips:
  • I used the two leftover vellum banners from my kit, along with two of the adhesive-backed flirty flamingo banners to decorate these wrapped treats. 
  • I die cut the heart image using the Sweet and Sassy Framelits. 
  • I used the "happy valentine's day" sentiment from Teeny Tiny Wishes, punched it out using the Classic Label Punch, then added Flirty Flamingo enamel shapes from the kit. 
  • I cut a strip of Pick a Pattern Designer Paper and punched both ends using the Banner Triple Punch. After wrapping the paper around my stacked treats, I stapled it closed. The Mini Tinsel Trim hides the staple. 


Shop Now Join my Team Paper Pumpkin Image Map