Quitabug Handmades- Home
Shop Now
Order 24/7
Join my Team
Paper Pumpkin
Classes and Events
Videos and Projects
Videos
Image Map
Showing posts with label animal outing. Show all posts

Monday, July 15, 2019

Simple Card from Start to Finish


Happy Monday! I'm back from Stampin' Up's Greek Isles incentive trip (I had an amazing time..pictures to come) and I have a super cute "thank you" card for you. I love the simple look of this card. The stitched rectangles add nice detail to this design.


HOST CODE- 34PGB2E3
Watch the video tutorial below for full instructions or CLICK HERE.


Whisper White thick base 4.25" x 11" scored at 5.5"
Designer paper 4" x 5.25"


Note: If viewing this blog post in an email, CLICK HERE to see post with full supply list.


Happening Now
♥ Bonus Days Coupons CLICK HERE
♥ Get More When You Join My Team in July/August CLICK HERE


Shop Now Join my Team Paper Pumpkin Image Map

Monday, February 11, 2019

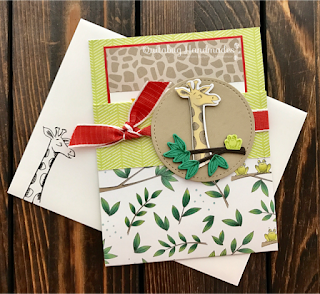
Wild About You Pocket Card


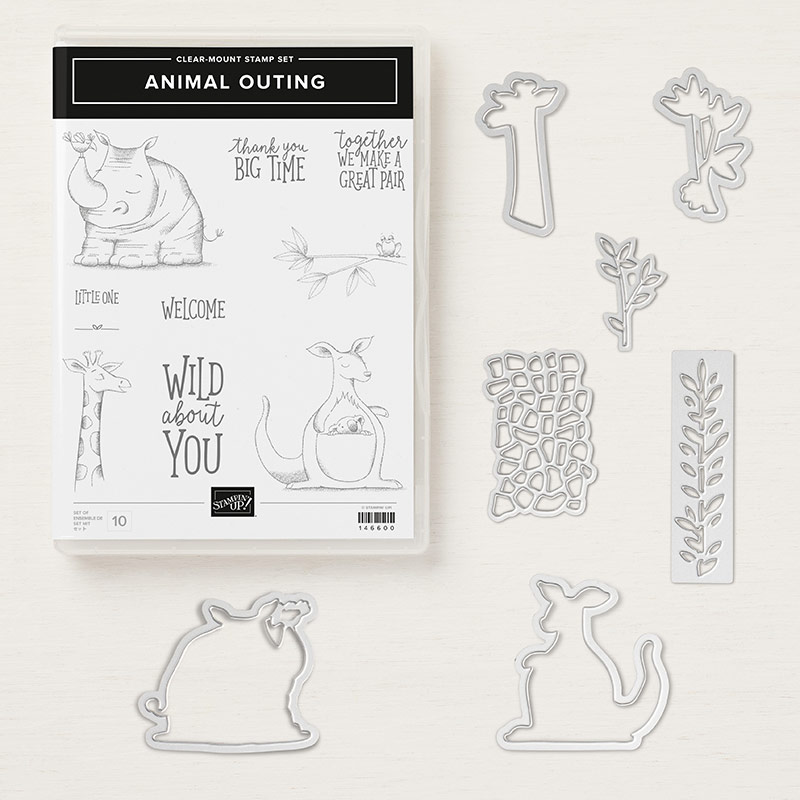
Happy Monday! I have been wanting to share another pocket card with you for a looong time. Check out my previous pocket card HERE. These are definitely one of my favorite card designs to create. I used the Animal Outing Bundle for today's creation.


HOST CODE- G3NA4TA7


Project Measurements
Designer Paper card base 4" x 10.5" score on the long side at 5.25" and 9"
Poppy Parade layer 3.25" x 5"
Whisper White sentiment layer 3-1/8" x 4-7/8"
Designer paper strip 1" x 3-1/8"

Helpful Tips:
  • Stamp the branch image three times, first in Lemon Lime Twist on Lemon Lime card stock. Second, in Shaded Spruce on Shaded Spruce card stock. Lastly, stamp in Early Espresso on Early Espresso card stock. Hand cut out the frog from the Lemon Lime, the leaves from Shaded Spruce and the branch from Early Espresso. Adhere the elements together using liquid glue. Layer the hand cut piece across the giraffe using dimensionals to pop it up. 
  • Stamp the branch image on the inside card layer using Shaded Spruce. Use a blender pen to spread the ink and lightly color in the image. 
  • Use the Animal Outing Framelit Dies to die cut a giraffe from the Animal Expedition Designer Paper.


NOTE: If you're viewing this post from email and can't see the supply list below, CLICK HERE.


Happening Now...

♥ Sale-A-Bration CLICK HERE for details
♥ Join My Team of Quitabug Stampers CLICK HERE for details
♥ Free Card Kits & Online Classes CLICK HERE for details


Shop Now Join my Team Paper Pumpkin Image Map

Friday, December 14, 2018

Thank You BIG TIME


Happy Friday! I'll be spending my Friday labeling our Christmas cards for this year so that I can mail them out tomorrow. Any fun plans for you all this evening?


I though I would share the project we created this Wednesday during my Facebook LIVE tutorial. I love the cute simplicity of this card. I hope you enjoy the video tutorial and I would love for you to join me for next week's LIVE tutorial.


HOST CODE- MCJTGZER


Watch the live video tutorial below or CLICK HERE.


Project Measurements
Basic Gray card base 5.5" x 8.5" scored at 4.25"
Designer Paper 3.75" x 5" and 2.5" x 5.5"
Whisper White 1" x 5"


Have a wonderful weekend! ♥


Shop Now Join my Team Paper Pumpkin Image Map

Monday, June 18, 2018

Together We Make A Great Pair


Happy Monday! I'm back from Vegas (had a blast by the way) and thought I would share a quick and easy card with you this evening featuring the new Animal Outing stamp set. This is such a cute set and it even comes in a bundle with a fun set of thinlit dies.


HOST CODE- QAY3JG9B


Watch the VIDEO tutorial for step by step instructions to create this card.


Project Measurements
Blackberry Bliss card base 5.5" s 8.5" scored at 4.25"
Grapefruit Grove layer 4" x 5.25"
Designer paper layer 1.75" x 5"
Blackberry Bliss layer 3.25" square
Whisper White sentiment layer 3" square


Shop Now Join my Team Paper Pumpkin Image Map